Saturday, December 27, 2008

Plain and Simple

Some recipes don't grab you. This was one of those at first. When a friend sent it to me, I never thought I'd make it, because I've never made bread before. I'd always assumed that it was a complex, delicate, impossible process. Then I came home for the holidays and was desperate for something that wasn't meat or cookies. White bread it is, then. (We don't want to be too healthy--it's still the holidays.)


After I made it, I realized how wrong I was. Everyone needs a good basic bread recipe, and this one is wonderful. It dense and moist, and it stands up well to butter and jam. The crust is golden and it's not too crumbly. It's plain and simple and easy. And above all, it's delicious. If you don't consider yourself a baker, or if you have had trouble with bread in the past, this is the recipe for you.


Maybe it wasn't the most complicated or flashy recipe I made over Christmas, (those are to come,) but it's one that I think everyone should have in their back pocket.


I hope you all had wonderful, relaxing holidays!

White Bread

1 cup milk
2 tbsp sugar
2 tsp salt
2 tbsp butter
1 cup water
2 packets dry yeast
6 cups flour

Scald milk. Add sugar, salt, butter, and water. Cool.

Soften yeast in 1/2 cup lukewarm water; add to milk mixture.

Put flour in large bowl, and add milk mixture. Mix and then turn dough out on a floured table or counter and knead. (You may add flour as needed until the dough no longer sticks to your hands.)

Grease bowl and put dough in bowl to rise for half an hour (it should be in a warm place). Punch down gently and let rise for another half an hour.

Prepare two loaf pans by greasing them and coating them lightly with flour.

Knead dough, cut into two halves, roll and shape into loaves. Put into loaf pans and let rise for another half an hour.

Bake at 400 degrees for 40 minutes. (This varies a lot from stove to stove, so check after 20 or 30 minutes.) Its usually done with the crust is a medium golden brown. Cool on racks. If you brush a little cold water on the crust when you remove them from the oven, the crust will be crispier.

Thursday, December 18, 2008

Soft and Salty and Delicious

I just love caramel. Salted caramel, in particular. So when I saw this recipe, which is from The Art and Soul of Baking, which I covet, I knew I had to make it.


Peanut butter cookies are wonderful in general, but when you add homemade peanut caramel to the middle of them...well, I don't know if it gets better than that. The cookies are dense and peanut butter-y, like they should be, and the caramel is soft and salty and delicious.


I also made the cookies much larger than they're supposed to be. For a recipe that's supposed to make 50 cookies, I got 25. Whoops. More room for caramel, is what I say. And you want as much caramel as you can get. I would eat this caramel with a spoon. Actually, I did eat this caramel with a spoon, because the recipe makes a ton of extra. Ice cream? Apple dip? There are a million possibilities. Another note about the caramel is that it doesn't totally set. It's not runny, but if you, say, poked a finger into it, your finger would come away sticky. Just something to think about.


To to sum up: peanuts+salt+caramel=make this now.

Peanut Butter Cookies with Salted Peanut Caramel
From David Lebovitz via The Art and Soul of Baking

Makes 50 small or 25 medium-sized cookies

8 tablespoons (115g) unsalted butter, at room temperature
1/2 cup (120g) packed light brown sugar
1/2 cup (100g) granulated sugar
1 large egg, at room temperature
1 teaspoon vanilla extract
3/4 cup (200g) creamy salted peanut butter (regular, not natural, is best)
1 3/4 cups (250g) flour
1/2 teaspoon baking soda
1/4 teaspoon salt


1 cup (250ml) heavy cream
1/2 cup (125ml) water
1 cup (200g) granulated sugar
1 tablespoon light corn syrup or glucose
1/8 teaspoon coarse salt
3/4 cup (100g) finely chopped roasted salted peanuts


Preheat the oven to 350F and line two baking sheets with parchment paper or silicone baking mats.

With an electric mixer, or by hand, make the cookie dough by beating the butter, brown and granulated sugar until smooth. Beat in the egg and vanilla until well blended. If using an electric mixer, scrape down the sides of the bowl.

Beat in the peanut butter.

In a separate bowl, whisk or sift together the flour, baking soda, and salt. Gradually add the dry ingredients to the peanut butter mixture and stir until there are no patches of flour.

Scoop up tablespoon-sized portions of the dough and roll each piece between your hands so they're as smooth as possible so they don't crack at the edges when performing the next step.


Space them 1 1/2-inches (2 cm) apart on the baking sheets, then use the rounded end of a wooden spoon, or your thumb, to make a depression in each one. Don't worry much if the sides crack; push them back together.

Bake the cookies for 13-16 minutes, rotating the baking sheets midway during cooking, until they are light-golden brown and the edges barely start to darken. Remove from oven, and while they're warm, press in to reinforce each depression with the end of the wooden spoon. Let cool completely.

Make the salted peanut caramel by warming the cream in a saucepan or microwave, and setting it aside. (Don't skip this step! If you add cold cream to the caramel, the sugar will crystallize too quickly. If this happens, immediately stir the mixture vigorously over low heat until the sugar melts again.)

Cook the water, 1 cup sugar, corn syrup, and salt to a caramel, gently swirling the pan only if necessary (to ensure it melt and cooks evenly) until it turns a nice golden brown. (This always takes longer than you think it will, but once it starts happening, it goes quickly. My very imprecise measure of timing is this: I wait until I start to get nervous that it's about to burn, let it cook for another twenty seconds, and then take it off. In terms of looks, if you add the cream to the caramel and it still looks translucent and dark, then it's burnt. It should be golden and cloudy.)


Remove from heat and immediately whisk in the hot cream in a slow, steady stream.

Cool until warm and pourable, then add the chopped peanuts. Spoon some of the caramel into each cookie, letting it set for about an hour, if you want to drizzle them with chocolate.


Storage: Cookies will keep in an airtight container, at room temperature, for 3 to 4 days. The unbaked dough can be rolled into rounds and stored in a heavy-duty freezer bag in the refrigerator or freezer, until ready to bake.

Tuesday, December 9, 2008

A Little Goopy

Thanksgiving was a few weeks ago now, but I still haven't shared with you the dessert. I wanted something a little different than regular apple pie. It's a favorite of mine, but I was looking for a twist. The Thanksgiving issue of Gourmet provided just the answer: Mexican brown sugar apple pie.


I've made pies before--I've even made good pies before--but I've never made a lattice crust. My attempt was less than perfect, but that never stopped my hungry family. They ate every piece.


And even though the whole thing was gone, I have to tell you something. It was only okay. The crust recipe...eh. (This is the recipe I should have gone with.) The filling? Pretty good, but I think next time I'd add some more cinnamon. It was also a little goopy--the apples were swimming in the syrup. I'd reduce it for longer next time, or only make half the recipe.


But maybe mine was bad luck, because the recipe seems like it should be great. So make it, have at it, and tell me if yours turns out any better.

Mexican Brown Sugar Pie
From
Gourmet

1/2 pound piloncillo (unrefined brown sugar; also called panela)*
3/4 cup water
4 (1-inch-wide) strips orange zest
1/4 teaspoon cinnamon
1/4 teaspoon ground allspice
2 1/2 pound medium apples
3 tablespoons all-purpose flour
Pastry dough (for a double-crust pie) (Use recipe above)
1 tablespoon milk
1 teaspoon sugar

Put a large heavy baking sheet in middle of oven and preheat oven to 425°F.

Bring piloncillo, water, zest, spices, and 1/8 teaspoon salt to a boil in a small heavy saucepan, covered, stirring occasionally until piloncillo has dissolved. Remove lid and boil over medium-low heat until syrup is thickened and reduced to about 3/4 cup, 6 to 10 minutes. Discard zest and cool syrup slightly.

Meanwhile, peel and core apples, then cut into 1/2-inch-wide wedges.

Toss apples with flour, then with syrup.

Roll out 1 piece of dough (keeping remaining piece chilled) on a lightly floured surface with a lightly floured rolling pin into a 13-inch round, then fit into a 9-inch pie plate.

Trim edge, leaving a 1/2-inch overhang, and chill shell.

Roll out remaining piece of dough on a lightly floured surface with a lightly floured rolling pin into a 16-by 11-inch rectangle. Cut dough crosswise into 11 (1 1/4-inch-wide) strips.

Stir apple mixture, then spoon evenly into pie shell. Weave a tight lattice pattern over pie with pastry strips.

Trim all strips flush with edge of pie plate. Fold bottom crust up over edge of lattice and crimp. Brush lattice (but not edge) with milk and sprinkle with sugar.

Bake pie on hot baking sheet 20 minutes.

Reduce oven temperature to 375°F and bake until crust is golden and filling is bubbling, 50 to 60 minutes more. Cool pie to warm or room temperature, about 1 1/2 hours.


*If you can’t get piloncillo, substitute 1 cup packed dark brown sugar and 2 tablespoons unsulfured molasses (not blackstrap). Syrup will take longer to reduce.

Tuesday, December 2, 2008

Unusual Pictures

I love Thanksgiving. Mostly because I love carbs in all forms. Give me bread, pasta, cake--anything, and I'm happy. But Thanksgiving night, after the stuffing and the pie and the potatoes and the gravy, even I need to take a break. That's why we had a non-traditional Thanksgiving dinner. (After the very traditional Thanksgiving lunch, of course.)

Here's the problem: I don't really have any pictures. Well, that's not true. I have a blurry--but pretty--picture of the salad, and, um, representational pictures of the main course. So you'll have to use your imagination a little. But, to make up for that, I'm going to give you two non-baking recipes. How does that sound?

First, there's a salad. To be perfectly honest, I'm not a huge fan of lettuce-based salads. For me, they're just a vehicle for salad dressing. So when I got to pick the salad, I chose one made up of things I actually like: grapefruit and avocado. At first I was skeptical of those two things with a mustard dressing, but let me tell you, it's wonderful. It gives it a nice fall edge while still being light, perfect for after eating an entire turkey. And, as a bonus, the red grapefruit and green avocado are beautiful together, as you can sort of see in my blurry, blurry picture.


And in terms of light things, I personally don't think you can ever go wrong with salmon. Especially salmon with a mustard and brown sugar glaze. If you don't like mustard, this probably isn't the meal for you. Luckily, I like it so hot that it stings my nose. The heat of the mustard in this recipe is tempered by the sweetness of the sugar, and they're both perfectly complemented by the salmon. Sadly, there are no pictures at all of this dish, because we ate it. And so I bring you pictures of the ingredients. Sort of.


*This fish not suitable for consumption

Grapefruit and Avocado Salad
Adapted from Ina Garten

1 tablespoon whole grain mustard
1/4 cup freshly squeezed lemon juice
1 1/2 teaspoons kosher salt
3/4 teaspoon freshly ground black pepper
1/2 cup good olive oil
4 ripe Hass avocados
2 large red grapefruits

Place the mustard, lemon juice, salt, and pepper in a small bowl. Slowly whisk in the olive oil until the vinaigrette is emulsified.

Before serving, cut the avocados in 1/2, remove the seeds, and carefully peel off the skin. Cut each half into 4 thick slices. Toss the avocado slices in the vinaigrette to prevent them from turning brown. Use a large, sharp knife to slice the peel off the grapefruits (be sure to remove all the white pith), then cut between the membranes to release the grapefruit segments.

Arrange the avocado slices around the edge of a large platter. Arrange the grapefruit segments in the center. Spoon the vinaigrette on top, sprinkle with salt and pepper, and serve.

You'll probably notice in the picture that I presented mine differently than Ina; I cut the avocado into chunks and mixed it gently in a bowl with the grapefruit and dressing. The grapefruit does break down after repeated mixing, but it still tastes just as good!


Salmon with Mustard and Brown Sugar Glaze
Adapted from Bon Appetit

3/4 cup dry white wine
1/4 cup butter, cut into small pieces
1 teaspoon Herbs de Provence
1 2-pound center-cut skinless salmon fillet

1/3 cup dijon mustard
1/4 cup (packed) golden brown sugar

Preheat oven to 350°F. Boil wine, butter, and Herbs de Provence in small saucepan 3 minutes. Sprinkle salmon on both sides with salt and pepper. Place fish on heavy rimmed baking sheet. Pour wine mixture over. Bake until fish is opaque in center, about 14 minutes. Remove from oven.

Preheat broiler. Mix mustard and sugar in small bowl to blend; spread over salmon to cover. Broil salmon until topping is brown and bubbling, about 3 minutes. Transfer salmon to platter and serve.


Tuesday, November 25, 2008

At Last

I know I've been talking about coconut cupcakes for a long time. Other things just kept getting in the way. New recipes, slightly better pictures, 22-hour bus rides to Georgia... But I'm home now, and finally ready to share these with you.

They're from Ina Garten's cookbook, which I've raved about before. I was paging through, saw this recipe, and literally couldn't get it out of my head. It followed me everywhere, until one Sunday afternoon, I just had to make it.


My cupcakes weren't quite as beautiful as Ina's--no big surprise there--but the piles of frosting and the rough texture of the coconut sprinkled on top made them look a bit rustic rather than messy. And the flavor...the coconut inside the batter kept them moist and came through beautifully. It wasn't overpowering, and it added just the right touch of something unique. And, of course, there's cream cheese frosting. Coconut cream cheese frosting, no less. What more could a girl ask for?


Coconut Cupcakes
Adapted from Ina Garten
1 1/2 cups all-purpose flour
1/2 teaspoon baking powder

1/4 teaspoon baking soda

1/4 teaspoon salt

1 cup sugar
3/4 cup (1 1/2 sticks) unsalted butter, room temperature

3 large eggs
3/4 teaspoon pure vanilla extract
3/4 teaspoon pure almond extract

1/2 cup buttermilk

1 7-ounce package flaked sweetened coconut, divided
Cream cheese icing

Line 16 muffin cups with paper baking cups, and set aside. Preheat oven to 325 degrees, and set oven racks at top and lower middle levels.

In a medium bowl, stir together the flour, baking powder, baking soda and salt. Set aside. In a large mixing bowl, beat together the sugar and butter on medium speed for about 3 minutes, or until light and fluffy. Turn the mixer speed to low, and add the eggs one at a time, beating 1 minute after each. Beat in the vanilla and almond extract. Scrape down the sides of the bowl, and beat again briefly.

Add the flour mixture and the buttermilk alternately to the butter mixture, beating on low speed after each addition just until combined. Fold in only 1 1/3 cups of the coconut.

Fill each muffin cup almost full with batter. (These cupcakes will overflow, which gives them a nice big top to put frosting on.) Bake in a 325-degree oven for 11 to 14 minutes on the top and lower-middle racks of oven, then reverse the positions of the two cupcake pans (putting the one from the top on the lower middle rack and vice versa), and bake another 11 to 14 minutes or until the cupcake tops are golden and a wooden toothpick inserted in the center of a cupcake comes out clean.

Allow the cupcakes to cool completely, and then top them with cream cheese icing and a sprinkle of coconut.

Thursday, November 20, 2008

Good Thoughts

I will be at the SOA/WHINSEC vigil this weekend. Send good thoughts, okay?

Peace.

Monday, November 10, 2008

Caramel! Peanuts! Brownies!

A few weeks ago, my next door neighbors had a party and I, as usual, promised to bring dessert. But this was actually a selfish act. I just bought Dorie Greenspan's book and couldn't wait to try something out.

There are a lot of tempting recipes, (devil's food cake! quintuple chocolate brownies!), but the one I knew I had to try, like right that moment, was the brownie cake with caramel and peanuts. The picture was just too beautiful to ignore, with a thick, dense brownie layered with dripping golden caramel and peanuts. I've always been a sucker for caramel and peanuts.

The cake, unfortunately, I overbaked just a wee bit. It still tasted good, but the brownie was cake-ier than I would have liked. I prefer the fudgy, almost under-baked kind. The caramel, though, was wonderful. I think I would put in a touch less corn syrup in the future, but other than that, it was perfect. And it went over beautifully with the guests.
Caramel Peanut Topped Brownie Cake
from My Home to Yours by Dorie Greenspan

For the cake:
1 cup all-purpose flour
1 tsp baking soda
¼ tsp salt
1 stick(8 TBSP) unsalted butter, cut into 8 pieces
3 ounces bittersweet chocolate, coarsely chopped
3 large eggs
½ cup light brown sugar
¼ cup sugar
3 TBSP light corn syrup
½ tsp vanilla extract
For the topping:
2 cups sugar
½ cup water
1 ½ TBSP light corn syrup
2/3 cup heavy cream
2 TBSP unsalted butter, at room temperature
1 cup salted peanuts

Butter and flour a 8 inch springform pan. Line bottom of pan with parchment paper. Put the pan on a baking sheet lined with parchment paper.

To make the cake: Whisk the flour, baking soda and salt together. Melt chocolate and butter together using a double boiler.

In a large bowl whisk the eggs and sugars together until well blended. Whisk in the corn syrup, followed by the vanilla. Whisk in the melted butter and chocolate. Still working with a whisk, gently stir in the dry ingredients, mixing only until they are incorporated. You will have a thick, smooth, shiny batter. Pour the batter into the pan and jiggle the pan a bit to even out the batter.
Bake the cake at 350F for 40-45 minutes, or until a knife inserted into the centre comes out almost clean. Transfer the pan to a rack and cool he cake for 15 minutes, then run a knife between the cake and the pan and remove the sides of the pan. During baking the cake probably will have puffed to the top of the pan don’t be concerned if tit sinks a little or it if develops a crater in the centre. Cool the cake to room temperature.

When the cake is completely cool, invert it, remove the base of the pan and peel off the paper.

Wash and dry the springform pan, and return the cake to it right side up. Refasten the sides around the cake.

To make the topping:
Put the sugar, water and corn syrup in a medium heavy bottomed saucepan, stir just to combine the ingredients and then put the pan over medium-high heat. Heat, without stirring , until the caramel turns deep amber., 5-10 minutes. Lower the heat a bit and, standing back from the saucepan add the cream and butter. When the spatters are less vehement, stir to calm down the caramel and dissolve any lumps. Stir in the peanuts, and pour the caramel and peanuts into a 1-quart Pyrex measuring cup or heat proof bowl.

Spoon the peanuts on top of the cake. Then spoon the caramel on top of those. You’ll have a layer about ¼ inch high. Allow the topping to set to room temperature-about 20 minutes before serving.

To serve, run a blunt knife between the caramel and the pan and simply remove the sides of the springform. If this isn’t the case, hit the sides with some hot air from a hairdryer or wrap the sides in a towel moistened with hot water.

Monday, November 3, 2008

Please, please, please.

Please vote tomorrow. If you are eighteen and an American citizen, please vote. You don't have to tell me who it's for, or why you've chosen your candidate, but VOTE. That is all.

Sunday, November 2, 2008

Lovely Things

A year ago at this time, I was living in London. Actually, a year ago at this time, I was coming back to London from a week in Vienna and Prague. I spent a semester in Europe, travelling and (occasionally) studying, and now I'm back here, in the cornfields.

Don't get me wrong. The cornfields have a beauty all their own; few things are lovelier than the neat green rows that glow at sunset, or the hills dotted with barns and silos. I miss the cathedrals, though, and the mystery of languages that I don't speak. I miss being somewhere new.

This post has nothing to do with food. These are just places that I miss. Where would you rather be?


The Thames, London


Carnaval in Notting Hill, London


Peppers in the Campo di Fiori market, Rome


Laundry in Trastevere, Rome


Prague


The Eiffel Tower at midnight


Graffiti on Oscar Wilde's grave, Père Lachaise Cemetery, Paris


Pathway in Père Lachaise Cemetery, Paris

Tuesday, October 28, 2008

Peanut Butter and Sympathy

Last week, I found out that I didn't get something that I really, really wanted.  And honestly, who doesn't want $28,000 to travel around the world and work on a non-academic project? But the point is, I did research for months, made contacts on four continents, and now...nothing.  C'est la vie, right?  

The important part, though, is what came out of this self-pity: more cupcakes.  I realize that I write about cupcakes a lot on this blog, but really they're kind of ideal for me at the moment.  They're more substantial than cookies, thereby increasing the amount of comfort they provide to my mopey self, and they're more portable than cake.  

For my self-pity cupcakes, I decided on peanut butter, with chocolate ganache.  I was afraid, with the way my luck was going, that they wouldn't turn out.  Luckily, they did. 

They're a perfect balance of sweet--the peanut butter is subtle, and salty enough to combat the rich, chocolaty ganache.  The cupcakes are moist, and even though I had my doubts about a (very thin) layer of ganache as frosting at first, once I tried one, I was sold.  

Make these cupcakes for any reason.  Self-pity, celebration, whatever.  But I can tell you from experience, they certainly help ease the pain.

Peanut Butter Cupcakes with Chocolate Ganache Icing
Adapted from "Chocolate Bar"

Makes 18 large cupcakes

1/4 cup peanut butter (I used all-natural)
6 tbsp. unsalted butter, softened
1 tsp. vanilla extract
1 1/2 cups dark brown sugar
2 eggs
2 cups sifted flour
2 tsp. baking powder
1/2 tsp. salt
3/4 cups milk

8 oz semisweet chocolate, coarsely chopped
1 cup heavy cream
2 tbsp. unsalted butter
2 tbsp. light corn syrup

Preheat the oven to 375 degrees and line the muffin tin with paper cups.

Cream the peanut butter, butter, and vanilla in a large bowl until well mixed.  Gradually add the sugar to the mixture, beating until light and fluffy, about three minutes.  Add the eggs one at a time, beating until incorporated.

In a separate bowl, sift the flour, baking powder, and salt together.  In three alternating batches, add the sifted ingredients and milk to the batter.   Scrape down the sides of the bowl as needed in between additions.  Beat until incorporated.

Fill the cups to just below the rim, and bake for 20 minutes, or until a toothpick comes out clean.  Do not overbake.  Remove from the oven and cool for 10 minutes in the pan before transferring the cupcakes to wire racks to cool completely.

Now for the icing.  In a heavy 1-quart saucepan, combine the cream, butter, and corn syrup and cook over medium heat until not but not boiling (little beads will form on the sides of the pot).  Pour the cream over the chocolate and stir until blended.  Let the ganache cool for 15-20 minutes.  Dip the tops of the cupcakes.  (This recipe will probably make more ganache than you need, so you can most likely cut the recipe in half and be fine.  I haven't tried it, though, so use your own discretion.)

Tuesday, October 21, 2008

Apologies...

I was catching up there for a while, but now I've lost my camera cord, and won't be able to upload pictures for about another week, and so here are things to think about:

Coconut cupcakes.  (I know, I've mentioned them before.  They're coming, I promise.)
Peanut butter cupcakes with chocolate ganache.
Brownie cake with salted butter caramel and peanuts.

And, hopefully, apple tart tatin.  

So please, bear with me.  I'll be back soon, I promise.

Friday, October 10, 2008

Midnight Baking

Remember how I told you about midnight baking? I do a lot of that. Most of my waking hours are spent in class, and thinking about what I did in class, and writing long, complicated papers about the things we talked about in class. Not that I don't love school, but sometimes I'd rather get up in the morning and bake cinnamon roll muffins than go talk about literature.

The problem with midnight baking is that it doesn't always--okay, fine, ever--make for the best photography. My pictures come out blurry, and even though the food is wonderful, the photographic evidence is only so-so. What I'm saying here is that you'll need to trust me on these things.

Last weekend, after I came home early to work on a paper that I did not want to write, I got hungry. Really, really hungry. And at 11:30 on a Friday night, when I was feeling sorry for myself, I didn't want pasta or a sandwich. I wanted baked goods. Preferably with cream cheese frosting.

A quick recipe search later turned up exactly what I was looking for: gingerbread cupcakes. So what if it's not Christmas? These cupcakes, eaten at one in the morning, were just what I needed. Spicy and warm, with melting frosting. And you know how I feel about cream cheese frosting.
It's starting to get cold now, with the wind sneaking in under our collars and the leaves turning to gold and orange. You need to fortify yourself for the long winter ahead, and the way to do that is with cupcakes. Trust me.

Gingerbread Cupcakes with Cream Cheese Frosting
Adapted from Gourmet

1 1/4 cups all-purpose flour
1 1/2 teaspoons ground ginger
1 teaspoon cinnamon
1/4 teaspoon ground cloves
1/2 teaspoon allspice
1/4 teaspoon salt
1/2 stick (1/4 cup) plus 2 tablespoons unsalted butter
1/2 cup granulated sugar
Just shy 1/2 cup unsulfured molasses
2 tablespoons vanilla yogurt
1 large egg, beaten lightly
1 teaspoon baking soda

1 (8-ounce) package cream cheese softened
1/2 cup (1 stick) unsalted butter softened
1 pound box confectioners' sugar
1 teaspoon vanilla extract
1 teaspoon kosher salt


Into a bowl sift together the flour, the ground ginger, the cinnamon, the cloves, the allspice, and the salt. In another bowl cream 1/2 stick of the butter, add the granulated sugar, and beat the mixture until it is fluffy. Beat in the molasses, the yogurt and the egg, beating until the mixture is smooth. In a measuring cup combine the baking soda with 1/2 cup boiling water and stir the mixture to dissolve the baking soda. Stir the mixture into the molasses mixture (the mixture will appear curdled) and stir the molasses mixture into the flour mixture, stirring to combine the ingredients well. Line twelve 1/2-cup muffin tins with paper liners and spoon the batter into the liners, filling them halfway. Bake the cupcakes in the middle of a preheated 350°F. oven for 20 minutes, or until a tester comes out clean. (The cupcakes will be flat or slightly indented on top.) Transfer the cupcakes to a rack and let them cool.

In a large bowl, combine the cream cheese and butter. Beat in confectioners' sugar until fluffy. Beat in vanilla and salt. Use liberal amounts to frost cupcakes.

Monday, September 29, 2008

Little Bow-Ties

I haven't written for a while. It's not because I haven't been cooking or baking. I've been doing both. It's because I've been writing other things. Papers on Russian literature and the editing techniques of film noir. And I love writing both of those things, but it doesn't leave me much spare time.

What it does leave me time for is quick dinners, and midnight baking. I bake, as you can probably guess, for stress relief. It makes me feel better to have coconut cupcakes or homemade doughnuts in the house. But I'll tell you about those later. Right now what I'm thinking about is pasta. Tiny little bow-ties dotted with green spinach and parmesean, and glistening with lemon butter sauce. How does that sound?

I eat pasta all the time. I think it might be the only thing besides desserts that I always, always have in my house. But I was getting tired of tomato sauce. And I was getting tired of white wine cream sauce. I even tried red wine cream sauce, which turned a rather frightening purple color. I needed something else, and that's when Ina Garten came to the rescue. Does anyone have her cookbook? Because I'm obsessed. (It was also the inspiration for those coconut cupcakes I mentioned.) Her food is beautiful, simple, and so good that it's almost hard to believe.

I had to tweak this recipe a little. I don't keep caviar around the house. But even with my adjustments, it's become my new favorite dish to have when I don't want to feel like I'm eating junk, or something incredibly boring. It's easy, pretty, and so, so good. Really.

Pasta with Lemon Butter Sauce and Spinach
Adapted from Ina Garten

Note: I usually just make this for myself, but it could very, very easily be adapted for more people. Also, all the amounts are approximate--it's pretty hard to mess up.

2 c. pasta (I like farfalle, the little bow ties)
2 tbsp melted butter
1 tsp lemon juice
1 serving frozen spinach
Parmesean
Salt and pepper

Put water on for your pasta to boil. While it's heating up, melt the butter in the microwave and sautee the spinach in some olive oil, salt and pepper. Set both things aside. Once water is boiling, add the pasta. Mine usually takes around 7-9 minutes to cook. Drain the pasta, and toss it with the butter, lemon juice and spinach. Sprinkle it with salt, pepper, and parmesean.

Saturday, August 30, 2008

Blue Velvet. Except, You Know, Red.

My Dad is not a dessert person. It's been a running joke in my family ever since we went to a restaurant specifically known for their ice cream and he ordered the sugar-free, fat-free sorbet. He doesn't order anything after dinner except for black coffee. There is one exception to the rule, though. Anything that involves cream cheese frosting. Carrot cake, pumpkin cake, and especially red velvet cake. Thus my birthday present to him: cake.
This was actually my second attempt at red velvet cake. The first time, I tried Paula Deen's recipe. I mean, I figured it's supposed to be kind of a Southern thing, and who better to learn from than someone who couldn't stop saying "y'all" if you offered her a...whatever Paula Deen doesn't already have. But I have to say, I was disappointed. It was fine, I guess. The cake turned out drier than I expected. It crumbled and just didn't live up to the rather high expectations that I had for it. In fact, the cake sat in my fridge for over a week, certainly a rarity in my house.

And so, the second time, I turned to someone else. Emeril. No, I can't stand him, and yes, his recipes often have too many ingredients, but dear lord was this cake good. Moist and flavorful, with a sheen to the inside of the cake that I love. It was just the way red velvet cake should be. And, as I'm my father's daughter, there was cream cheese frosting. Lots of cream cheese frosting.
While my pictures fail to capture the beauty and brightness of this cake, I can assure you that the taste is unaffected. More photography would have followed if someone who will remain nameless hadn't fed the rest of it to her friends when I wasn't there to supervise.

Red Velvet Cake
Adapted (very slightly) from Emeril Lagasse

For the cake:

2 1/2 cups sifted cake flour
2 teaspoons cocoapowder
1 teaspoon baking soda
1 teaspoon baking powder
1 teaspoon salt
1 1/2 cups sugar
1/2 cup (1 stick) unsalted butter softened
2 large eggs
1 cup buttermilk

2 ounces red food coloring

1 teaspoon distilled white vinegar
1 teaspoon vanilla extract

For the frosting:

1 (8-ounce) package cream cheese softened
1/2 cup (1 stick) unsalted butter softened
1 pound box confectioners' sugar
1 teaspoon vanilla extract
1 teaspoon kosher salt


Preheat the oven to 350 degrees F.

Grease the bottom of two 9-inch round baking pans. Line the bottoms with parchment paper, then grease and flour the paper. In a medium bowl or on a piece of waxed paper, sift together flour, cocoa, baking soda, baking powder, and salt; set aside. In a large bowl, cream together sugar and butter. Beat in eggs, 1 at a time. Alternately add flour mixture and buttermilk. Beat in food coloring and vinegar, then add vanilla. Spread the batter evenly in the pans.

Bake for 20 to 30 minutes or until a wooden toothpick inserted into the center comes out clean. Turn out onto a rack to cool and remove parchment paper.

In a large bowl, combine the cream cheese and butter. Beat in confectioners' sugar until fluffy. Beat in vanilla and salt. Use frosting to fill and ice cake.


Saturday, August 16, 2008

Worth Burning Your Tongue

There's something I should admit to right now: I never ate tom kha gai when I was actually in Thailand two years ago, but I should have. My first experience with the smooth, light coconut-lemongrass soup was at a restaurant in London last year, and I was sold.

Not that I didn't eat well in Thailand. There was curry, which was heavy and hot and completely without the bell peppers that they put in fake Thai curry here. There was the Chinese-inspired soup they sold in all the markets that was a broth with noodles and bean sprouts that came with a little condiment rack of chili oil, chili flakes and other dark sauces that I would load into my soup until it was so spicy that my eyes watered and my nose ran. And--the thing I miss the most--there were tiny fried coconut milk and corn cakes, shaped like little UFOs, that would come straight off the griddle and were worth burning your tongue on.

But back to tom kha gai. You might have seen it on Top Chef as one of Lisa's dishes in the finale a couple of months ago. (Her entire menu looked amazing. In fact, as much as I loved the soup when I ate it in London, it was seeing it on the show that gave me the undeniable urge to make it right now.) It's a soup that's meant to be served with a meal. The thick coconut milk cools the mouth between spicier dishes, and the lemongrass helps to cleanse the palate. The truth is, though, that I eat it as a meal.

The most important part of making this is having the real Thai ingredients. They're not obscure ones--you can find these at any Asian grocery store. I know fish sauce weirds some people out, but trust me on this: it's what makes the soup. I use canned vetetables (I know, I know,) but you could easily use fresh ones.

Now, unfortunately, I ate all of my soup before I could take a picture of it. All I have is the empty bowl and the beautiful spoon, given to me by a friend. I hope you forgive me.
Tom Kha Gai (Lemongrass Coconut Soup with Chicken)
Makes 2-3 servings

2 8 oz. cans coconut milk (not coconut cream)
1 8 oz. can chicken stock
3 one-inch chunks of galangal (Thai ginger)
2 stalks of lemongrass, bruised or cut into a tassel at the white end
1 can straw mushrooms
1 can baby corn
1 can bamboo shoots
2 chicken breasts, sliced
5-6 kaffir lime leaves, torn in half lengthwise
5-6 bruised Thai chilis (more if you like it spicy)
Fish sauce (I use Golden Boy brand)
Palm sugar


Combine the coconut milk, chicken stock, galangal and lemongrass in a large pot over medium-high heat until it becomes fragrant. Season with the fish sauce, (which is used in Thai cooking in place of salt,) and palm sugar to taste. Add the bamboo shoots, which take the longest to cook. Simmer for 7-8 minutes and add the baby corn, mushrooms, and chicken. Simmer for an additional 4-5 minutes, then add the lime leaves and chilis and serve.

Friday, August 8, 2008

Some Kind of Wonderful

I was walking down the street by my house the other day, in my new neighborhood that I love, and the weather was perfect, a rarity here. And I thought, "I'm really happy right now." So what does this call for?

Pomegranate champagne sorbet.
I had this a couple of years ago at a restaurant, and have been thinking about it ever since. Now that it's warm outside, and I'm in a celebrating mood, it seemed like the time to break it out. I'd never actually made a sorbet before, or any kind of ice cream, so the first attempt was, how shall we say, slushee-like? Not that there's anything wrong with pomegranate champagne slushees, but it wasn't what I was hoping for.

So I tried it again the next night, with a little tweaking. As much as I love pomegranate, pure pomegranate juice can be a little overwhelming. Luckily, in my fridge, I happened to have some blood orange juice. Perfect. I mixed it all up, let it churn in the ice cream machine for much longer than the instructions said it would take, (more on that later,) and out came a beautiful, pinky-orange sorbet, the color of a just-ripening watermelon, with tiny little bubbles throughout. It's light and sour, and I think my friend with whom I shared it was right in saying that the champagne taste was more noticeable once it had solidified in the freezer overnight, as opposed to its mostly-frozen state straight out of the machine.

This sorbet is for the summer. (Really, what sorbet isn't?) But more importantly, this is celebratory sorbet. So find something worth a little pat on the back, and make this recipe.

Pomegranate Mimosa Sorbet
Makes 6 servings

4 cups pomegranate juice
1 cup blood orange juice
1/4 cup light corn syrup
1 1/4 cup sugar
3/4 cup champagne or sparkling wine

Heat the first four ingredients in a saucepan over medium heat, until all the sugar has dissolved. Remove from heat, and refrigerate for at least one hour. This was my mistake in the first batch--if the mixture is too warm when it goes into the ice cream maker, it will take significantly longer to freeze, and you might run out of ice, (as I did,) long before your sorbet is no longer a slushee, (as mine was.)

After this, you just add the champagne and put the whole mixture into your ice cream maker and follow the directions. Since everyone's is different, I can't guarantee how yours works, but I'll give you a few tips that I learned from mine:

*Add salt to the ice water surrounding the cylinder containing the juice mixture. It lowers the temperature considerably and makes it freeze faster.
*If you don't let the juice mixture cool beforehand, your sorbet will likely take over an hour to freeze.
*Don't overfill the ice bucket--it will prevent the sorbet from churning.
*It's done when it starts to look as if the machine is having difficulty churning it any longer. Don't keep mixing it! You'll damage your ice cream maker.

Sunday, August 3, 2008

The Holy Trinity: Salt, Cream Cheese, and Butter. Okay, and Brown Sugar.

There are no two ways around it--my mother taught me to bake. I never realized until recently how ingrained the things that she taught me were; then I started saying things like, "You mean you don't have a springform pan?" and, "What do you mean, what's a waterbath?" My house was the one growing up where everyone wanted to eat, and my lunches were always envied because my cookies didn't have a nautically-themed, store-bought name. I was spoiled, in fact. There are many things that I just can't eat now because I had them too often when I was young. Yes, I know, poor me, having eaten so many brownies and peanut-butter bars that I can't face them any longer. My life has been so hard.

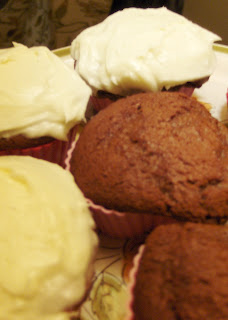
But these cinnamon rolls...I don't think I'll ever be on such bad terms with them. I think I could eat them every day, every meal, until I weigh so much that they have to lift me out of the house with a crane. And that would be fine, just as long as I could bring the pan with me.

To begin with, they have cream cheese frosting. Nothing bad ever came from a recipe with cream cheese frosting. And under the frosting, they're dripping with caramelized brown sugar. It clings to every swirl of the dough, and coats the bottom of the pan so that you can't take a single bite without the very real threat of rotting out every tooth in your head. Like I said, though, it would be worth it.

And, as it always is with baking, the devil's in the details. I will do my best to tell you every little trick that my mother taught me so that these turn out. Because if they do, I guarantee you, you'll never look back. They're so good that my dog wanted to help me bake this last batch, and ended up with a nose full of flour to show for it. They will convert you to the faith of gooey, dripping frosting and brown sugar. As I have said, so it shall be.

Perfect Cinnamon Rolls
Adapted from Alton Brown

Dough:
4 large egg yolks, room temp
1 large whole egg, room temp
2 ounces sugar, approx. 1/4 cup
3 ounces unsalted melted butter, approx. 6 tbs
6 ounces buttermilk, room temperature (If you don't have buttermilk, you can use 1 cup of milk to 2 1/2 tbs of lime juice)
20 ounces all-purpose flour, approx. 6 cups, and extra for dusting
1 package instant dry yeast, approx. 2 1/4 tsp
1 1/4 tsp kosher salt
Vegetable oil or cooking spray

Filling:
16 ounces light brown sugar, approx. 2 cup packed
2 tbs cinnamon
Pinch of salt
A large chunk of softened butter, approx. 3 tbs

Icing:
4 ounces cream cheese, approx. 1/3 cup
3 ounces unsalted butter, approx. 6 tbs
1/2 tsp salt
1/4 tsp vanilla extract
6 ounces powdered sugar

For the dough: Whisk together the egg yolks, whole egg, sugar, butter, and buttermilk. Add approximately 2 cups of the flour, the yeast and the salt; whisk until moistened and combined. In an electric mixer, use a dough hook to mix together the egg, sugar and buttermilk mixture and all but 3/4 cup of the remaining flour and knead on low speed for 5 minutes. The dough should feel soft and moist but not sticky; add more flour if necessary. Knead on low for an additional 5 minutes or until the dough clears the sides of the bowl. Turn the dough out onto a lightly floured surface and knead by hand for an additional 30 seconds. Lightly oil the sides of a large bowl and transfer the dough into it. Lightly oil the top of the dough, cover and let it double in volume, 2 to 2 1/2 hours.

Combine the brown sugar, cinnamon and salt in a medium bowl. Mix until well incorporated. Set aside.

Butter a 9x13 inch glass baking dish. Line the bottom of the dish with parchment paper, and then butter the top of the paper. Punch down the risen dough and turn it out onto a lightly floured work surface. Shape the dough into a rectangle with the long side nearest you by hand. Using the rolling pin, roll the dough into an 18x12 inch rectangle. Using your hands, (or a knife if you must,) spread the butter evenly on the dough, leaving a 3/4 inch border along the top edge. Do the same with half of the filling. Beginning with the edge nearest you, tightly roll the dough into a cylinder. Pinch the unbuttered seam closed to seal the roll. Gently squeeze the cylinder to create an even thickness. Cut the rolls using a serrated knife into 1 1/2-inch rolls, creating 12 rolls.

Spread the other half of the filling in the pan with the parchment paper. Evenly space the rolls in the baking dish, cover tightly with plastic wrap, and allow the rolls to rise in the fridge overnight.

The next morning...

Preheat the oven to 350 degrees. Place the rolls on the center rack and bake until golden brown, about 25 minutes. Remove the rolls from the oven and invert the pan onto a large serving platter so that all the melted sugar on the bottom spreads over the top. While the rolls cool slightly, whisk the cream cheese in an electric mixer until creamy. Add the butter and vanilla and whisk until combined, then add the salt and powdered sugar a bit at a time. Whisk until smooth. Spread over the rolls and serve immediately.

Baking tips from my mother, to me, to you:
*Oiling the bowl helps the bread to rise better, because it isn't clinging to the sides.
*Parchment paper, parchment paper, parchment paper. If you're planning to turn something out of a pan, (not just these rolls, but cakes or anything else,) parchment paper is going to make your life much easier. Just be sure to butter the pan and the paper.
*A little salt in the cream cheese frosting helps to cut the sweetness of the sugar. People underestimate the importance of salt in dessert. Even though it looks like a small amount, don't skip the salt.

Friday, August 1, 2008

Brie for Breakfast

I love breakfast food. Love, love, love. And don't give me any of that egg-white omelette, non-fat yogurt stuff. I want big thick slices of bread, rich yellow egg yolks and crisp red bacon streaked with tan. So when my mom made this for Easter brunch a few months ago, I didn't stop thinking about it until last night when I decided to make it myself.

I don't think this recipe was originally intended to be a breakfast food, but it's just so perfect. She served it with baked french toast spread with vanilla-bean butter and maple baked bacon, and it was a wonderful savory counterpoint to the french toast and the orange juice. The top was crusty and golden, and inside was moist and melted with cheese and artichoke hearts. The moment I tasted it, though, I knew what it was missing: something to give it another texture, something to stand up to the artichokes. It was missing mushrooms.

So I made it for myself and added the mushrooms. It was perfect. Everything that I loved about it was still there, and now there were mushrooms. Plump, tender mushrooms. And when I say it was perfect, I mean except for one itty bitty thing. I think it could use another addition: bacon. Not a ton of it, but just enough to give it a little crunch. So if anyone ever makes this and takes that into consideration, let me know. I have enough leftovers here to last me a while, so I don't think I'll be making it again any time soon.

This recipe makes a ton of food, so I wouldn't judge you if you cut it in half.

Spinach, Artichoke and Mushroom Stuffing
Adapted from Emeril Lagasse

Something important about this recipe: chop everything beforehand. It is undoubtedly the most time-consuming part of the whole process. Emeril says that this only takes fifteen minutes of prep time. He is either lying, or has six sets of hands.

Ingredients:
1/4 cup extra virgin olive oil
2 pounds spinach
1 pound mushrooms (I just sliced up one large container from the store)
2 cups chopped yellow onion (slightly less than one large onion)
1 tbs chopped garlic
3 (8.5 oz) cans quartered artichoke hearts
2 large eggs
1 loaf cubed (1 inch) day-old French bread (You can use fresh bread if you have to, but it won't soak up the liquid as well)
1 1/2 cups heavy cream
2 cups chicken stock
2 tbs lemon juice
1 cup grated Parmesan
1 pound Brie, rind removed and cut into cubes
Salt, pepper, basil, oregano and parsley flakes to taste

Preheat oven to 350 degrees and grease a 9x13 baking pan with olive oil

Bring a large pot of water to a boil and add the spinach. Cook until wilted, about 30 seconds. Drain and rinse with cold water. Squeeze as much water as possible from the spinach and chop roughly. Set it aside.

Heat a tablespoon of olive oil over medium-high heat in the biggest skillet you can find. (Trust me--there's going to be a lot of stuff in it.) Add the chopped onions and cook until they're just beginning to brown. Add the garlic, and spices to taste. Cook for about thirty seconds, and add the artichoke hearts and the mushrooms. Stir and cook for another 3-4 minutes and remove from heat.

Combine eggs, cream, chicken stock and lemon juice, along with more spices to taste, in a large bowl and whisk. Add the bread, spinach, artichoke and mushroom mixture, Brie, and 1/2 cup of your Parmesan. If the bread doesn't soak up the liquid right away, let it sit for 15-20 minutes.

Pour the mixture into your baking dish and brush the top with the remaining olive oil. Sprinkle the remaining Parmesan on top. (You can always add more...just a thought.) Bake in the oven for about an hour, until the top is golden brown and the center is firm.