Tuesday, May 26, 2009

A Long Time

It's been a long time, I know. I've been busy with finals, graduating, and dragging all of my stuff back home in preparation for my move to the Czech Republic. So here's a a short post with an elegant, celebratory recipe.


Spicy Cumin Cheese Straws
Adapted from Epicurious

4 ounces extra-sharp Cheddar cheese, shredded fine (about 1 1/4 cups)
1/2 teaspoon ground cumin
1/4 teaspoon cayenne, or to taste
1/2 package frozen phyllo dough, thawed
2 sticks butter
1 tablespoon cumin
1/2 tablespoon paprika
coarse sea salt to taste

In a small bowl toss together cheese, ground cumin, paprika, and cayenne.

Separate your phyllo dough into individual sheets. Brush one sheet with butter all the way to the edges. Smooth a second sheet of phyllo on top of it. Continue until you have used half of your phyllo sheets. Sprinkle the cheese and spices onto the dough, leaving a one-inch strip along the top and bottom. Press another phyllo sheet on top, making sure to seal the edges with the butter so your straws don't fall apart. Continue layering the phyllo sheets until you run out. Brush the top sheet with butter and sprinkle with sea salt.

With a pastry wheel or sharp knife cut pastry into strips about 7 1/2 inches long and 1/2 inch wide. Twist strips and arrange on baking sheets, pressing ends onto sheet to keep strips twisted.

Preheat oven to 350°F. and grease 2 baking sheets.

Arrange half of cheese straws about 1 inch apart on 1 baking sheet and bake in middle of oven 8 to 10 minutes, or until pale golden. Bake remaining cheese straws in same manner.

Serve cheese straws warm at room temperature.

Sunday, May 3, 2009

Unexpected Ways

Sometimes things come together in unexpected ways. Like spending months and months desperately searching for a job after graduation only to hear...absolutely nothing. And then finding out that the one job that did interview you went to someone else. And then a week later getting an e-mail that says...you got it.

Did I mention that I have a job?

Oh, and it's in Prague. That's right, beginning in July I will be writing to you from the Czech Republic, where I will hopefully have a kitchen and not just a hot plate and a microwave. Unfortunately at the moment, that's looking like it might be the case. We'll see.


But like I was saying, sometimes things that you don't expect to work out just...do. Like these tacos. Normally, the combination of lime, beans, feta and hot sauce would seem a little strange. But let me tell you, these tacos have won over everyone who has tried them, even the most skeptical of critics. There's something about the barely-there flavor of the cumin that the feta complements beautifully, and the hot sauce and lime just enhance everything else, rather than overwhelming it.


And the best part is, they're ready in under ten minutes. I've made this recipe at least five times since I first saw it, and if only I had feta in my fridge right now, I'd be going on number six for dinner.

Black Bean Tacos with Feta and Slaw
from Smitten Kitchen

Makes 4 tacos

1 15-ounce can black beans, drained
1 teaspoon ground cumin
5 teaspoons olive oil, divided
2 tablespoons (or more) fresh lime juice
2 cups coleslaw mix or shredded cabbage
2 green onions, thinly sliced
1/3 cup chopped fresh cilantro
4 white or yellow corn tortillas
1/3 cup crumbled feta cheese
Hot sauce

Place beans and cumin in small bowl; partially mash. Season to taste with salt and pepper. Mix 2 teaspoons olive oil and lime juice in medium bowl; add coleslaw, green onions, and cilantro and toss to coat. Season slaw to taste with salt and pepper.

Heat 1 tablespoon olive oil in large nonstick or cast iron skillet over medium-high heat. Add tortillas in single layer. Spoon 1/4 of bean mixture onto half of each tortilla; cook 1 minute. Fold tacos in half. Cook until golden brown, about 1 minute per side. Fill tacos with feta and slaw. Add hot sauce as desired.

Thursday, April 23, 2009

Thanks Mom

I should preface this by saying that I personally did not make this soup. My mother did. It was delicious nonetheless. It's from Ina Garten's show The Barefoot Contessa, which always features simple recipes that I want to make the second I see them.


I usually prefer really smooth tomato soups, but the flavor of this soup is so deep from roasting the tomatoes that I made an exception. The texture enhances the combination of tomato and basil, and works beautifully with the barely-there punch from the red pepper.


Again, you have my mom to thank for this one.

Roasted Tomato Basil Soup
From Ina Garten

3 pounds ripe plum tomatoes, cut in half
1/4 cup plus 2 tablespoons good olive oil
1 tablespoon kosher salt
1 1/2 teaspoons freshly ground black pepper
2 cups chopped yellow onions (2 onions)
6 garlic cloves, minced
2 tablespoons unsalted butter
1/4 teaspoon crushed red pepper flakes
1 (28-ounce) canned plum tomatoes, with their juice
4 cups fresh basil leaves, packed
1 teaspoon fresh thyme leaves
1 quart water

Preheat the oven to 400 degrees F. Toss together the tomatoes, 1/4 cup olive oil, salt, and pepper. Spread the tomatoes in 1 layer on a baking sheet and roast for 45 minutes.

In an 8-quart stockpot over medium heat, saute the onions and garlic with 2 tablespoons of olive oil, the butter, and red pepper flakes for 10 minutes, until the onions start to brown. Add the canned tomatoes, basil, thyme, and chicken stock. Add the oven-roasted tomatoes, including the liquid on the baking sheet. Bring to a boil and simmer uncovered for 40 minutes. Pass through a food mill fitted with the coarsest blade. Taste for seasonings. Serve hot or cold.

Thursday, April 16, 2009

Muffin Top

There's a reason that I've had this song stuck in my head for two days: I made muffins. (Unfortunately, I can't find a clip of Jenna actually singing the song...you'll just have to imagine.)


I'm not usually a muffin person. They're fine, I suppose, but not something I ever crave. Usually they're too dry, and the truth is, I don't really like blueberry muffins, which seems to cut out ninety percent of my options. The other night, though, I happened to be in possession of just one orange, and a desperate desire not to begin writing my senior thesis. I wanted to make scones, but since my copy of Baking doesn't include a recipe for orange scones, I decided that muffins would have to do.


I'm so glad that I did. These muffins are wonderful. And hopefully that means a lot coming from someone who isn't easily impressed by a muffin. They're moist from the honey and have just enough orange flavor that it's noticeable without being overpowering. They don't crumble when you slice them, and with a little butter, they're beautiful for breakfast. I modified the recipe some, since it originally called for blueberries. I think mini chocolate chips made an excellent substitution.


These are best the day they're made, and perhaps the next morning. However, they'll keep for 2-3 days and still be delicious.

Orange Chocolate Chip Muffins
Adapted from Baking, by Dorie Greenspan

Grated zest and juice of 1 large orange
About 3/4 cup buttermilk
2 large eggs
3 tablespoons honey
1 stick (8 tablespoons) unsalted butter, melted and cooled
1/3 cup sugar
2 cups all-purpose flour
2 1/2 teaspoons baking powder
1/4 teaspoon baking soda
1/4 teaspoon salt
1 cup miniature chocolate chips

Decorating sugar, for topping (optional; I forgot to do this)

Center a rack in the oven and preheat the oven to 400 degrees F. Butter or spray the 12 molds in a regular-size muffin pan or fit the molds with paper muffin cups. Place the muffin pan on a baking sheet.

Pour the orange juice into a large glass measuring cup or a bowl and pour in enough buttermilk to make 1 cup. Whisk in the eggs, honey and melted butter.

In a large bowl, rub the sugar and orange zest together with your fingertips until the sugar is moist and the fragrance of orange strong. Whisk in the flour, baking powder, baking soda and salt. Pour the liquid ingredients over the dry ingredients and, with the whisk or a rubber spatula, gently but quickly stir to blend. Don’t worry about being thorough - the batter will be lumpy and bubbly, and that’s just the way it should be. Stir in the chocolate chips. Divide the batter evenly among the muffin cups.

Bake for 22 to 25 minutes. If you want to top the muffins with decorating sugar, sprinkle on the sugar after the muffins have baked for 10 minutes. When fully baked, the tops of the muffins will be golden and springy to the touch and a thin knife inserted into the center of the muffins will come out clean. Transfer the pan to a rack and cool for 5 minutes before carefully removing each muffin from its mold.

Thursday, April 2, 2009

Addictive

How do you feel about vinegar? Particularly balsamic vinegar? Because I love it, but it's a recent development for me. Up until last year, I was actually a bit afraid of balsamic vinegar, at least as it relates to desserts. But that was then.


One late summer afternoon, my uncle had a bottle of really nice balsamic vinegar. The kind that comes with a rating system for quality. You know, the fancy stuff. Having spent the afternoon experimenting with putting Tabasco sauce on fruit, (it's excellent with watermelon and mango,) my uncle suggested that I try balsamic vinegar with my strawberries. I resisted at first. It seemed so strange. (Not like Tabasco!) But one berry and I was sold. The sweetness and acidity of the vinegar blended so well with the taste of the strawberry that I had to restrain myself from eating the whole basket. And, my uncle informed me, it also went great with ice cream.


I forgot about that advice until about a month ago, when we had vanilla ice cream and an unopened bottle of balsamic vinegar in my apartment. My last few caramel-making venture had ended in disaster--the lights in my kitchen are so bad that I have a hard time seeing the sugar as it melts, and then it burns--and I wasn't up for wasting another cup of cream. Balsamic vinegar to the rescue.

The taste is undeniably unexpected. The contrast is much more marked than it is with the strawberries; the smoothness of the ice cream seems almost jarring against the sharp vinegar. But after your first bite, it's addictive. Soon, though, it wasn't enough to just pour it over my storebought vanilla ice cream. Naturally, the next step was homemade balsamic vinegar ice cream.


The combination as an ice cream is much less shocking in your mouth than its predecessor's individual parts. It has a tangy, light taste, almost like yogurt. The smooth texture does wonders for the flavors, eradicating the strong taste of straight vinegar that comes with using it as a topping. I love this recipe. I absolutely, completely, and wholeheartedly love it. But to do so, you have to absolutely, completely, and wholeheartedly love balsamic vinegar. If you have your doubts, if you're on the fence, this might not be the recipe for you. (For example, my mother thinks that this ice cream is "interesting.") But if you're like me, you won't be able to stop eating it. Or thinking about it. Or wanting to make another batch. I don't blame you.

Balsamic Vinegar Ice Cream
8 egg yolks
1 cup sugar
2 cups heavy cream
2 cups milk
1 tsp vanilla extract
4 tablespoons regular balsamic vinegar
1 tablespoon white balsamic vinegar
A pinch of kosher salt

In a medium bowl combine egg yolks, salt and sugar and whisk until pale in color. In a large pot or saucepan bring cream, milk, and vanilla extract to a boil. Slowly add the hot milk and cream to the egg mixture, whisking constantly. Add balsamic vinegar and chill for at least 2 hours. Once mixture is cold, run in ice cream machine in accordance with manufacturer's instructions and return to freezer for as long as possible (preferably 4-6 hours) before serving.

Wednesday, March 25, 2009

To The Point


And now, without further ado...


Apple-Apple Bread Pudding
From "Baking: From My Home to Yours" by Dorie Greenspan

3 medium apples, peeled and cored (I used Granny Smiths)
3 T butter
3 T sugar

12 oz. egg bread, sliced .5" thick
1 C spiced apple butter
3 C whole milk
1 C heavy cream
3 large eggs
5 large egg yolks
.75 C sugar
1 tsp vanilla

Butter a 9 x 13" baking pan, dust the inside with sugar, and tap out the excess. Line a larger roasting pan with a double thickness of paper towels.

Cut each apple in half from top to bottom, cut each half lengthwise into 6-8 slices, and then cut each slice in half crosswise.

Put a large skillet (preferably nonstick) over medium-high heat, add the butter, and when it melts, sprinkle over the sugar. Cook the butter and sugar for a minute or so--you want the sugar to caramelize but not burn, so adjust the heat accordingly. Toss in the apple slices--don't worry if the caramel seizes and lumps, it will melt and smooth out as you work--and cook, carefully turning the apples once or twice, until they are tender but not soft, 3-5 minutes. They should be golden, and some might even be caramelized. Transfer the apples and the liquid to a plate.
(I tore my bread into pieces before staling it, rather than retaining the whole slices.) If your bread is not stale, spread it out on a baking sheet lined with parchment or a silicone mat and bake at 350 F to "stale" it for 10 minutes.

Spread one side of each slice of bread with the apple butter, then cut each slice on the diagonal to get 4 triangles. (I put my bread chunks and apple butter in a bowl and tossed them until they were coated.) Cover the bottom of the baking pan with half of the bread, arranging the triangles, buttered side up, so that they overlap slightly (don't worry about spaces between the slices). Spoon over the apples and their liquid and finish "the sandwich" with the rest of the bread.
Bring the milk and cream just to a boil.

Fill a teakettle with water and put it on to boil; when the water boils, turn off the heat. (I skipped this step, as I couldn't find my roasting pan to be able to put my baking pan in it.) Meanwhile, in a medium bowl, whisk together the eggs, yolks, and the .75 C sugar. Still whisking, slowly drizzle in about one quarter of the hot milk mixture--this will temper, or warm, the eggs so they won't curdle. Whisking all the while, slowly pour in the remaining milk. Add the vanilla and whisk to blend. Rap the bowl against the counter to pop any bubbles that might have formed, then spoon off any foam that has risen to the top. Pour the custard over the bread and press the bread gently with the back of a spoon to help it absorb the liquid. Leave the pan on the counter, giving the bread the back-of-the-spoon treatment now and then, for about 30 minutes.
Center a rack in the oven and preheat the oven to 325 F.

Put the baking pan in the roasting pan, slide the setup into the oven and very carefully pour enough hot water into the roasting pan to come halfway up the sides of the pudding pan. Bake the pudding for about 1 hour and 25 minutes, or until a thin knife inserted deep into the center comes out clean. Transfer the baking pan to a rack and cool for at least 20 minutes before serving.

Saturday, March 21, 2009

Ice Boulders

I have to apologize for my long absence. My midterms this semester (my last semester of college...yikes!) completely overwhelmed me. And then for spring break, instead of going to Cancun or Hawaii, I went here:


With these two:


We played on the beach, which was still full of icy boulders even though it was warm enough not to wear a jacket. We read, watched movies, and made the world's worst batch of biscuits.


I know I promised you caramel apple bread pudding, and I will hold to that promise and more. Again, soon.

Friday, March 6, 2009

Soon?

Caramel apple bread pudding? Yes?


Soon. I promise.

Thursday, February 26, 2009

The February Greys

You must have nights like these: there's nothing in the fridge, you don't want to go to the store, and everything just seems like such an effort. Yeah, I've been there. Especially in the winter, when the options start to feel so much more limiting at this point in February.

So what's the cure for the almost-end-of-February greys? It turns out that it involves big, heavy, cheesy biscuits. The truth is, I think a lot of problems can be solved with cheese. It always works for me, at least.


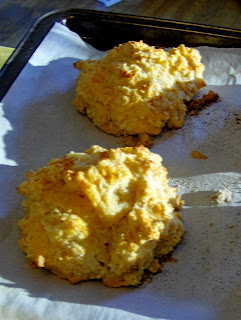
These paprika and cheddar biscuits are, in a word, gorgeous. They puff up with deep, craggy tops and tiny melted pockets of cheese. The paprika is just barely there--in fact, I think I would punch it up a little bit the next time I make these, but they're absolutely lovely as they are right now. The texture is chewy and soft, and in short, they were just what I needed. Served next to a bowl of tomato soup (from a box, sadly,) they made the perfect accompaniment.


Paprika and Cheddar Biscuits
From Joy the Baker, who in turn adapted it from Martha Stewart

Makes 10 biscuits

2 1/4 cups all-purpose flour

1 1/4 teaspoon baking powder

3/4 teaspoon baking soda

1 teaspoon salt

2 teaspoons sugar

3/4 teaspoon sweet smoked paprika, plus more for dusting

6 Tablespoons unsalted butter, cold, cut into pieces

6 ounces cheddar, finely grated (about 1 cup)

1 cup milk

1/2 cup sour cream

Preheat the oven to 375 degrees F. Line a baking sheet with parchment paper.

In a large bowl, whisk together the flour, baking powder, baking soda, salt, sugar and paprika. Using a pastry blender, or your fingers, cut the butter into the flour mixture until it resembles course meal with a few larger clumps remaining. Stir in the cheese with a fork.

Add the milk and sour cream; using a rubber spatula, stir until the dough just comes together. The dough will be slightly sticky; don’t over mix. Using a 1/3-cup, scoop mounds of dough about 1 1/2-inches apart of the prepared baking sheet. Lightly dust with paprika.

Bake, rotating the sheet halfway through baking, until golden brown, about 15 to 20 minutes. Slide parchment and biscuits onto a wire rack to cool or let biscuits cool on pan for 5 minutes before removing onto a wire rack with a spatula. Serve warm or at room temperature.


Thursday, February 19, 2009

Tuxedos

Sometimes, recipes just don't turn out, despite your best efforts. Or my best efforts, anyway. Like these cookies. The first time I made them, it was a disaster. I'm pretty sure that I mismeasured the butter, and the dough literally fell apart in my hands as I tried to roll it into logs. There were crumbly chunks of chocolate and vanilla dough all over my floor. It was a sad night.


But try try again--I made them again the other night, and they turned out beautifully. Really beautifully. Almost like tuxedo jackets, with the contrast between the halves, and sparkling on top with large grains of salt, they look elegant and ready to serve for something fancy. The salt (and we all know how much I love salt) brought out all the best qualities in the chocolate, giving a deeper, richer flavor that was balanced nicely by the delicate vanilla. They're dense without being dry or crumbly, and the butter comes through in every bite. I would serve them with tea or coffee, after a rich dinner.


When you're making these, make sure you measure the butter correctly. It's really important--I'm pretty sure I was off by less than a tablespoon, and it completely changed the dough.

Tuxedo Cookies (aka Salted Chocolate Vanilla Bean Cookies)
From Joy the Baker, who adapted it from Martha Stewart

2 cups all-purpose flour, plus more for work surface
1/4 teaspoon salt
14 tablespoons unsalted butter, softened
1 cup confectioners’ sugar
1 large egg yolk, save egg white for brushing cookie dough
1/2 teaspoon pure vanilla extract or scraped vanilla beans from 1/4 vanilla pod
2 tablespoons unsweetened Dutch process cocoa powder
2 tablespoons semi sweet chocolate, very finely chopped
course sea salt

Sift flour and salt into a medium bowl; set aside. Put butter and sugar into the bowl of an electric mixer fitted with the paddle attachment, and mix on medium speed until pale and fluffy, 2 to 3 minutes, scraping down sides of bowl as needed. Reduce speed to low. Mix in egg yolk and vanilla bean or extract. Gradually add flour mixture; mix until just combined, about 1 minute.

Remove half of the dough; set aside. Add cocoa powder and chopped chocolate to remaining dough; mix on low speed until well combined. Turn out chocolate dough onto a lightly floured work surface. Roll into a 10-inch log, about 1-inch wide and 1/2-inch tall. Repeat with reserved vanilla dough. Wrap each rectangle in plastic wrap, and refrigerate until slightly firm, at least 30 minutes.

Remove the chilled doughs from the fridge. Brush the top of the chocolate piece with a bit of a remaining egg white. This will help the chocolate and vanilla stick together. Press the vanilla piece on top of the moistened chocolate piece. Press lightly. Rewrap dough and refrigerate for at least 2 hours, or overnight.

Preheat oven to 350 degrees. Cut log into 1/4-inch-thick rounds; space 1 inch apart on baking sheets lined with parchment paper. If dough becomes too soft to slice cleanly, return to freezer until firm. Sprinkle course sea salt onto the chocolate half of the cookies. Press in lightly with fingertips.

Bake until firm to the touch, 10 to 12 minutes. Transfer to wire racks; let cool. Cookies can be stored in airtight containers at room temperature up to 3 days.

Monday, February 9, 2009

Leftovers

Being sick might be my least favorite thing. I think it's right up there with not being able to sleep, although when the two go hand-in-hand, it's infinitely worse. In case you couldn't tell, I've had a cold for a while.

But before I started feeling so awful, I made something great. Something rich and creamy and filling. And it wasn't even dessert. It was risotto.


Risotto is made with arborio rice, rather than just regular rice, which is what gives it its creamy, soft texture. Combined with cheese and vegetables, it's the perfect winter comfort food. But what's really amazing about risotto is the leftovers. Or, more precisely, what you can do with them.


Risotto cakes. Risotto fritters? I don't know what to call them, but they're delicious. Crispy and browned on the outside, soft on the inside. They're not the most beautiful things in the world--the cakes don't stay together particularly well--but once you take a bite, you'll forget all about the haphazard presentation. They don't even really deserve the term "leftovers." I might even love them more than the original risotto itself.

Whatever you call them, whichever you prefer, make this recipe. It won't disappoint.

Mushroom, Asparagus and Artichoke Heart Risotto Cakes
Adapted from Smitten Kitchen

5 cups vegetable broth (40 fl oz)
1 cup water
1 pound thin to medium asparagus, trimmed and cut into 1/4 inch thick slices, leaving tips 1 1/2 inches long
1 tablespoon olive oil
1/2 stick (1/4 cup) unsalted butter
3/4 pound cremini mushrooms, stems discarded and caps cut into 1/4 inch thick slices
1 small jar artichoke hearts
1 small yellow onion, finely chopped
1 1/2 cups Arborio rice (10 oz)
1/2 cup dry white wine
2 ounces finely grated Parmigiano-Reggiano (1 cup, though I used half)

Olive oil, for the cakes

Bring broth and water to a boil in a 4-quart pot. Add asparagus and cook, uncovered, until crisp-tender, 3 to 4 minutes. Transfer asparagus with a slotted spoon to a large bowl of ice and cold water to stop cooking, then drain and pat dry. Keep broth at a bare simmer, covered.

Heat oil with 1 tablespoon butter in a 4-quart heavy saucepan over moderately high heat until foam subsides, then saute mushrooms, stirring occasionally, until browned, about 4 minutes. Season with salt and pepper, then transfer to a bowl.

Cook onion in 2 tablespoons butter in saucepan over moderate heat, stirring, until softened, about 3 minutes. Add rice and cook, stirring, 1 minute. Add wine and cook, stirring, until absorbed, about 1 minute.

Ladle in 1 cup simmering broth and cook at a strong simmer, stirring, until absorbed, about 2 minutes. Continue simmering and adding broth, about 1/2 cup at a time, stirring frequently and letting each addition be absorbed before adding next, until rice is just tender and looks creamy, 18 to 20 minutes. (Save leftover broth for thinning.)

Remove from heat and stir in 1/2 cup cheese, remaining tablespoon butter, and salt and pepper to taste. Gently stir in asparagus, artichokes and mushrooms, then cover pan and let stand 1 minute. If desired, thin risotto with some of remaining broth. Serve immediately with remaining cheese on the side.

Now, you can stop here for the risotto. Or you can eat half the risotto now, and save some for later. Whatever your decision, here are the instructions for the risotto cakes:

In a medium skillet, heat 1 tbsp. olive oil over medium-high heat. Once heated, use a 1/4 cup measure to put the risotto in the skillet, keeping it as much of a "cake" shape as possible. Let it brown for several minutes, until crispy on the bottom. Flip it over, and brown for another few minutes.

If your cake falls apart a little, don't worry. It's still going to taste just as good.

Friday, January 30, 2009

Pippi

I found a puppy! Yes, a real live puppy. I was walking to campus, and from far away, I saw what I thought was a cat running across someone's yard. There are a lot of outdoor cats around here, so that wasn't unusual. When I got closer, though, I was confronted with a small, furry black puppy. I reached down to pet her, and she started whimpering. She wasn't wearing a collar, and she was skin and bones.


Someone else walked past, scaring her, and she darted under the nearest truck, which was parked in front of a house that is well-known for being...of ill repute, shall we say? As in, I wouldn't trust the people there to take responsible care of an animal, much less a defenseless puppy.

It took me forty-five minutes to lure her out from under the car, and involved: a banana, a sandwich, and half a package of deli turkey. Since she wasn't wearing a collar, and since no one seemed to be around to claim her, I took her home and fed her lots of peanut butter and snacks.


I wish I could have kept her, but student life isn't very conducive to caring for puppies. Pippi, as I named her, is currently residing at the no-kill animal shelter where I volunteer. Hopefully she'll find a loving home soon.

It's cold outside, everyone. Please, please take good care of your animals. If you find a stray, alert local animal control or the police, and if possible contact a local no-kill shelter so that they can try to get a hold of the animal and help it reach a good home.


More recipes soon, I promise.

Saturday, January 24, 2009

Saturday Night Live

It's 10:30 on a Saturday night, and I'm at home. And so, so happy about it. It's rare that I get the apartment totally to myself. As much as I love my roommates, it's nice to have some alone time. Which is why I'm here, on a Saturday, watching episodes of House on my computer, and am totally content. And since the thermometer informs me that it is currently -3 degrees outside, I don't see myself leaving any time soon. I'll just rest here, perfectly content in my couch cocoon.


Well, I could be just a little more content. Maybe if I had some cake.


Like, say, maybe a vanilla pound cake that I served with this sorbet a few weeks ago. A good, heavy cake with enough vanilla in it to make it interesting, but not so much that it gets overly sweet. A pound cake that rises up beautiful and golden on the outside, and moist and dense once you slice into it.

Sure, I could use one of those cakes right now. Or some of these. They're next up on the list.


Vanilla Pound Cake
From Recipe Zaar

2 cups sugar
1 cup butter, softened
5 eggs
2 teaspoons vanilla
3 cups flour
1 teaspoon baking powder
1 cup milk

Heat oven to 350° F.

Cream sugar and butter together until smooth. Add the eggs one by one, mixing well after each addition. Add the vanilla and beat on high for 5 minutes.

Whisk the flour and baking powder together. With the mixer on low, add the flour and baking powder alternately with the milk, beating well after each addition.

Spoon the batter into a greased and floured 10-inch tube pan. Bake for 65-75 minutes, until a toothpick inserted into the center comes out clean. Cool the cake for 15 minutes, and invert onto a cake plate.

Friday, January 16, 2009

Heart-Shaped

Birthdays are my calling, I think. I always volunteer to bring the dessert, no matter how busy I am, or how little time I have to actually make something. I get it from my mother, this undeniable need to make the perfect dessert for everyone. So when there was a birthday for someone who doesn't like chocolate, but loves chesecake, I immediately thought of for caramel and macadamia ricotta cheesecake. It just looked so beautiful. Plus, I got to make caramel, which as you all know, I love to do. I made the cake in the shape of a heart, because who doesn't want a heart-shaped cheesecake for their birthday?


If you've never had a ricotta cheesecake before, you might be a little surprised by the texture. It's not as smooth as cheesecake made with just cream cheese. To be honest, I think I prefer the just cream cheese version. But that doesn't meant that this one wasn't delicious, because it was. The macadamia nuts with the caramel perfectly balance against the vanilla cheesecake, and the texture of the nuts with the light, creamy cake is beautiful. If I made it again, I think I would do the full cream cheese version, so if you try it, let me know.


If you use a water bath, make sure the seal is tight! I've ruined more than one cheesecake with a water-logged crust. If the seal has been broken and water has gotten in, you'll see lots of little bubbles in the top of your cheesecake after baking.

Another note: the measurements for the recipe are in grams because it comes from a (wonderful, absolutely beautiful) European website. If you don't have a scale, (which you should, because they're so helpful!) you can find conversions here, at another wonderful, beautiful blog.

Caramel and Macadamia Ricotta Cheesecake
Adapted from Nordljus

For the cheesecake
400 g good quality ricotta cheese, at room temperature
(if it seems too watery, hang it in muslin overnight to drain)
200 g good quality cream cheese, at room temperature
120 g sugar
2/3 vanilla pod
4 eggs, lightly beaten
60 ml sour cream

For the base
160 g graham cracker crumbs
40 g unsalted butter, melted

For the nut topping
150 g macadamia nuts
90 g sugar

For the caramel sauce
65 g unsalted butter
160 g sugar
100 ml whipping cream

Preheat the oven to 275ºF. Lightly grease a 20cm springform cake tin and line the base and sides with parchment paper.

To make the base, whiz the graham crackers to crumbs in a food processor (or put them in a plastic bag and bash with a mallet or rolling pin). Mix with the melted butter to a wet, sandy consistency. Transfer to the lined tin and flatten with the back of a tablespoon to create a level base. Bake in the oven for 10 minutes and set aside. Once the pan has cooled, wrap the bottom and sides tightly in foil. You may want to use several layers, because you definitely don't want water getting in.

To make the cake batter, put the sugar, ricotta cheese and cream cheese in a mixing bowl. Slit the vanilla pod lengthways in half and, using a sharp knife, scrape the seeds out into the bowl. Whisk by hand, or more easily with an electric mixer, until smooth. Gradually add the eggs and sour cream, whisking until smooth. Pour the mixture over the crust and prepare the water bath.

To prepare the water bath, take a large, flat pan, (one that can fit your springform pan in it with room to spare around the sides,) and place your foil-wrapped springform pan in the center. Fill the large pan with hot water so that it is about halfway up the sides of the larger pan. Place in the oven. Bake for about 60 minutes, until set; a skewer inserted in the center should come out with a slightly wet crumb attached. Leave to cool at room temperature, then remove the side of the tin. Transfer the cake to a cake board or plate – but you can serve from the tin base if that proves tricky. Now chill the cake for at least a couple of hours.

To prepare the nut topping, scatter the nuts over a baking sheet and roast in the oven at 275ºF for about 15 minutes, until golden. Remove from the oven and set aside. Line a baking tray with parchment paper. Place the sugar in a saucepan with a very thick base (it is important that the layer of sugar is not more than 3mm high in the pan, so choose a large one). Heat the sugar gently until it turns into a golden-brown caramel. Do not stir it at any stage. Don’t worry if some small bits of sugar don’t totally dissolve. Carefully add the toasted nuts and mix gently with a wooden spoon. When most of the nuts are coated in caramel, pour them on to the lined tray and leave to set. Break bits off and chop them very roughly with a large knife. It’s nice to leave some of the nuts just halved or even whole.

To make the sauce, put the butter and sugar in a thick-bottomed saucepan and stir constantly over a medium heat with a wooden spoon until it becomes a smooth, dark caramel. The butter and sugar will look as if they have split. Don’t worry; just keep on stirring. Once the desired color is reached, carefully add the cream while stirring vigorously. Remove from the heat and leave to cool.

To finish the cake, spoon the sauce in the center, allowing it to spill over a little. Scatter lots of caramelized nuts on top. The cheesecake will keep in the fridge for 3 days.

Monday, January 12, 2009

Thanks!


The Blonde Duck was sweet enough to award me the Honest Scrap Award for my little blog.

So the rules for receiving this award are:

1. Choose a minimum of 7 blogs that you find brilliant in content or design.

2. Show the 7 winners' names and links on your blog, and leave a comment informing them that they were prized with “Honest Scrap.” Well, there’s no prize, but they can keep the nifty icon.


3. List at least ten honest things about yourself.


Okay, here's my thing. I'm pretty new to the foodblogging world, so I'm still in the process of making friends with all of you wonderful people. I don't actually "know" (in the sense that we've exchanged comments etc.) seven of you yet! So drop me a line, leave me a comment. I want to hear from you. But there are a few people (besides the BD) that I want to know how great I think their blogs are...

Elra
Kaitlin
Bonnie

I love reading all of your recipes!

Ten honest things, huh? Okay...
1) I'm an English major.
2) I love dogs and do a lot of work at animal shelters.
Which leads to...
3) My New Year's resolution is to be vegetarian. Eek.
4) I will probably be moving to New York next year to find a real job. Double eek.
5) Paris and London are my favorite cities in the world.
6) Okay, honestly I'm not really vegetarian because I'm still going to eat fish.
7) I've ridden a camel in front of the pyramids in Egypt.
8) I dream about owning a bakery/book store.
9) I have a scar from a rice krispy treat.
10) One of my favorite authors is Stephen King.

Thursday, January 8, 2009

Citrus Season

Winter is one of my favorite times of the year, if only because it means that citrus fruit is finally in season. I love the sourness of grapefruit and oranges, and the way that the juice drips out of them when you cut them open to see all of the perfectly-sized segments. Last week, I came home with a twenty-pound bag of grapefruit, and realized that I had to do something with it. As much as I crave it, I just couldn't eat the whole thing alone. I thought about stir fry, and about juice. But then I realized that there was no dessert in the house. And that just wouldn't do.


I didn't have a specific recipe for grapefruit cupcakes, but by taking the ingredients from a few basic recipes and tweaking them a little bit, I hit on something that I think is pretty fantastic.


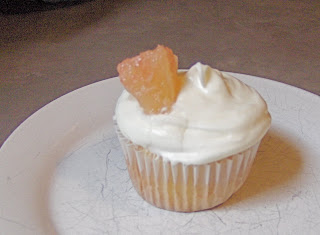
These cupcakes are light and tart, with a beautiful golden color. The zest almost melts into the crumb, and the flavor really shines through in the aftertaste. The next time I make them, I might even add another tablespoon of juice. The cream cheese frosting is, of course, amazing. A little bit of salt draws the grapefruit juice out and makes it sing. After the heavy holiday foods we've all been eating, I think these are the perfect dessert.


I haven't tried these with any other fruit juice yet, but I imagine they would be just as good with orange or lime juice. Let me know if you come up with anything else!

Grapefruit Cupcakes

Zest and juice from one half of a red grapefruit, plus several intact segments
¾ cup self rising flour
¾ cup all purpose flour
½ cup butter at room temperature
1 cup sugar
2 eggs
½ cup milk

8 oz. cream cheese (softened)
1/2 cup butter (softened)
1 lb. powdered sugar
1 tbsp. grapefruit juice
1 tsp. salt

Preheat the oven to 350 degrees. Line a muffin tin with 12 liners. Combine the flours in a bowl.

Cream the butter and sugar until smooth. Add the eggs one at a time, mixing well after each addition. Add the flour and milk in three parts, flour-milk-flour. Mix just until blended. Add the juice and zest, and beat until just combined.

Spoon the batter into the muffin tin, filling each cup just over half full. Bake for 12-15 minutes, until a toothpick inserted into the center comes out clean.

Meanwhile, beat together the butter and cream cheese until no lumps remain. Add the powdered sugar and salt. When combined, add the grapefruit juice. Beat for five minutes to ensure that the icing is smooth.

When the cupcakes have cooled, frost them and garnish with part of a grapefruit segment.

Friday, January 2, 2009

"Adventurous" Eating

I'm (fairly) new to the world of adventurous eating. Maybe "adventurous" should even be in quotes. Up until a couple of years ago, I had never eaten an olive. I didn't know what feta was. And I definitely, definitely didn't eat spinach. I was a picky kid, and some of that transferred over into my so-called "adult" life. And then suddenly, it stopped. And suddenly things like this recipe, which I saw both on another blog and in my November issue of Gourmet, became recipes that I couldn't live without.


I was right, of course. And thank god. My life would be infinitely worse without this recipe, which I made for my family as our Christmas dinner. It's a little holiday-y, with the green spinach, reddish olives and the creamy white feta. I need to take a moment here to berate my younger self for never eating Kalamata olives, because they're amazing. Salty and briny, and if people wouldn't judge me, I would probably eat an entire container of them in one sitting. And the garlic chips! How can you go wrong with fried garlic? I've made this recipe for three different dinner parties, and it never ceases to impress. Or that's what I gather, since there are never any leftovers.


I make the recipe with spinach rather than swiss chard, though I'm sure it's just as incredible with the original. I also omit the currants, but if you like them, go for it! It's an easy, elegant recipe that looks beautiful but takes almost no time to make. It's undoubtedly one of my favorites, something that I'll pull out whenever I want to wow people without putting in too much effort. Because that's the way it should be, right?

Spaghetti with Spinach and Garlic Chips
Adapted from Gourmet, November 2008

Makes 4 to 6 servings

1/3 cup extra-virgin olive oil
1 head garlic, cloves peeled and thinly sliced lengthwise
1 medium onion, finely chopped
2 pounds spinach
1/2 cup water
1 pound spaghetti
1/2 cup Kalamata olives (The recipe says to cut them into slivers; as you can see, I sliced them crosswise. I'm sure it doesn't matter.)
6 ounces feta, crumbled (1 1/2 cups)

Heat oil in a 12-inch heavy skillet over medium heat until it shimmers, then cook garlic, stirring, until golden, about 3 minutes. Transfer garlic with a slotted spoon to paper towels to drain.

Cook onion in oil remaining in skillet over medium heat, stirring occasionally, until softened, 3 to 5 minutes.

Stir spinach into onion mixture with water and 3/4 teaspoon each of salt and pepper. Cook, covered, over medium-high heat until tender, about 5-7 minutes.

Meanwhile, cook spaghetti in a pasta pot of boiling salted water (2 tablespoons salt for 5 quarts water) until al dente. Reserve 1 cup pasta-cooking water and drain spaghetti.

Toss spaghetti with spinach, olives, and 1/2 cup cooking water, adding more cooking water if necessary. Season with salt and pepper. Serve sprinkled with feta and garlic chips.